


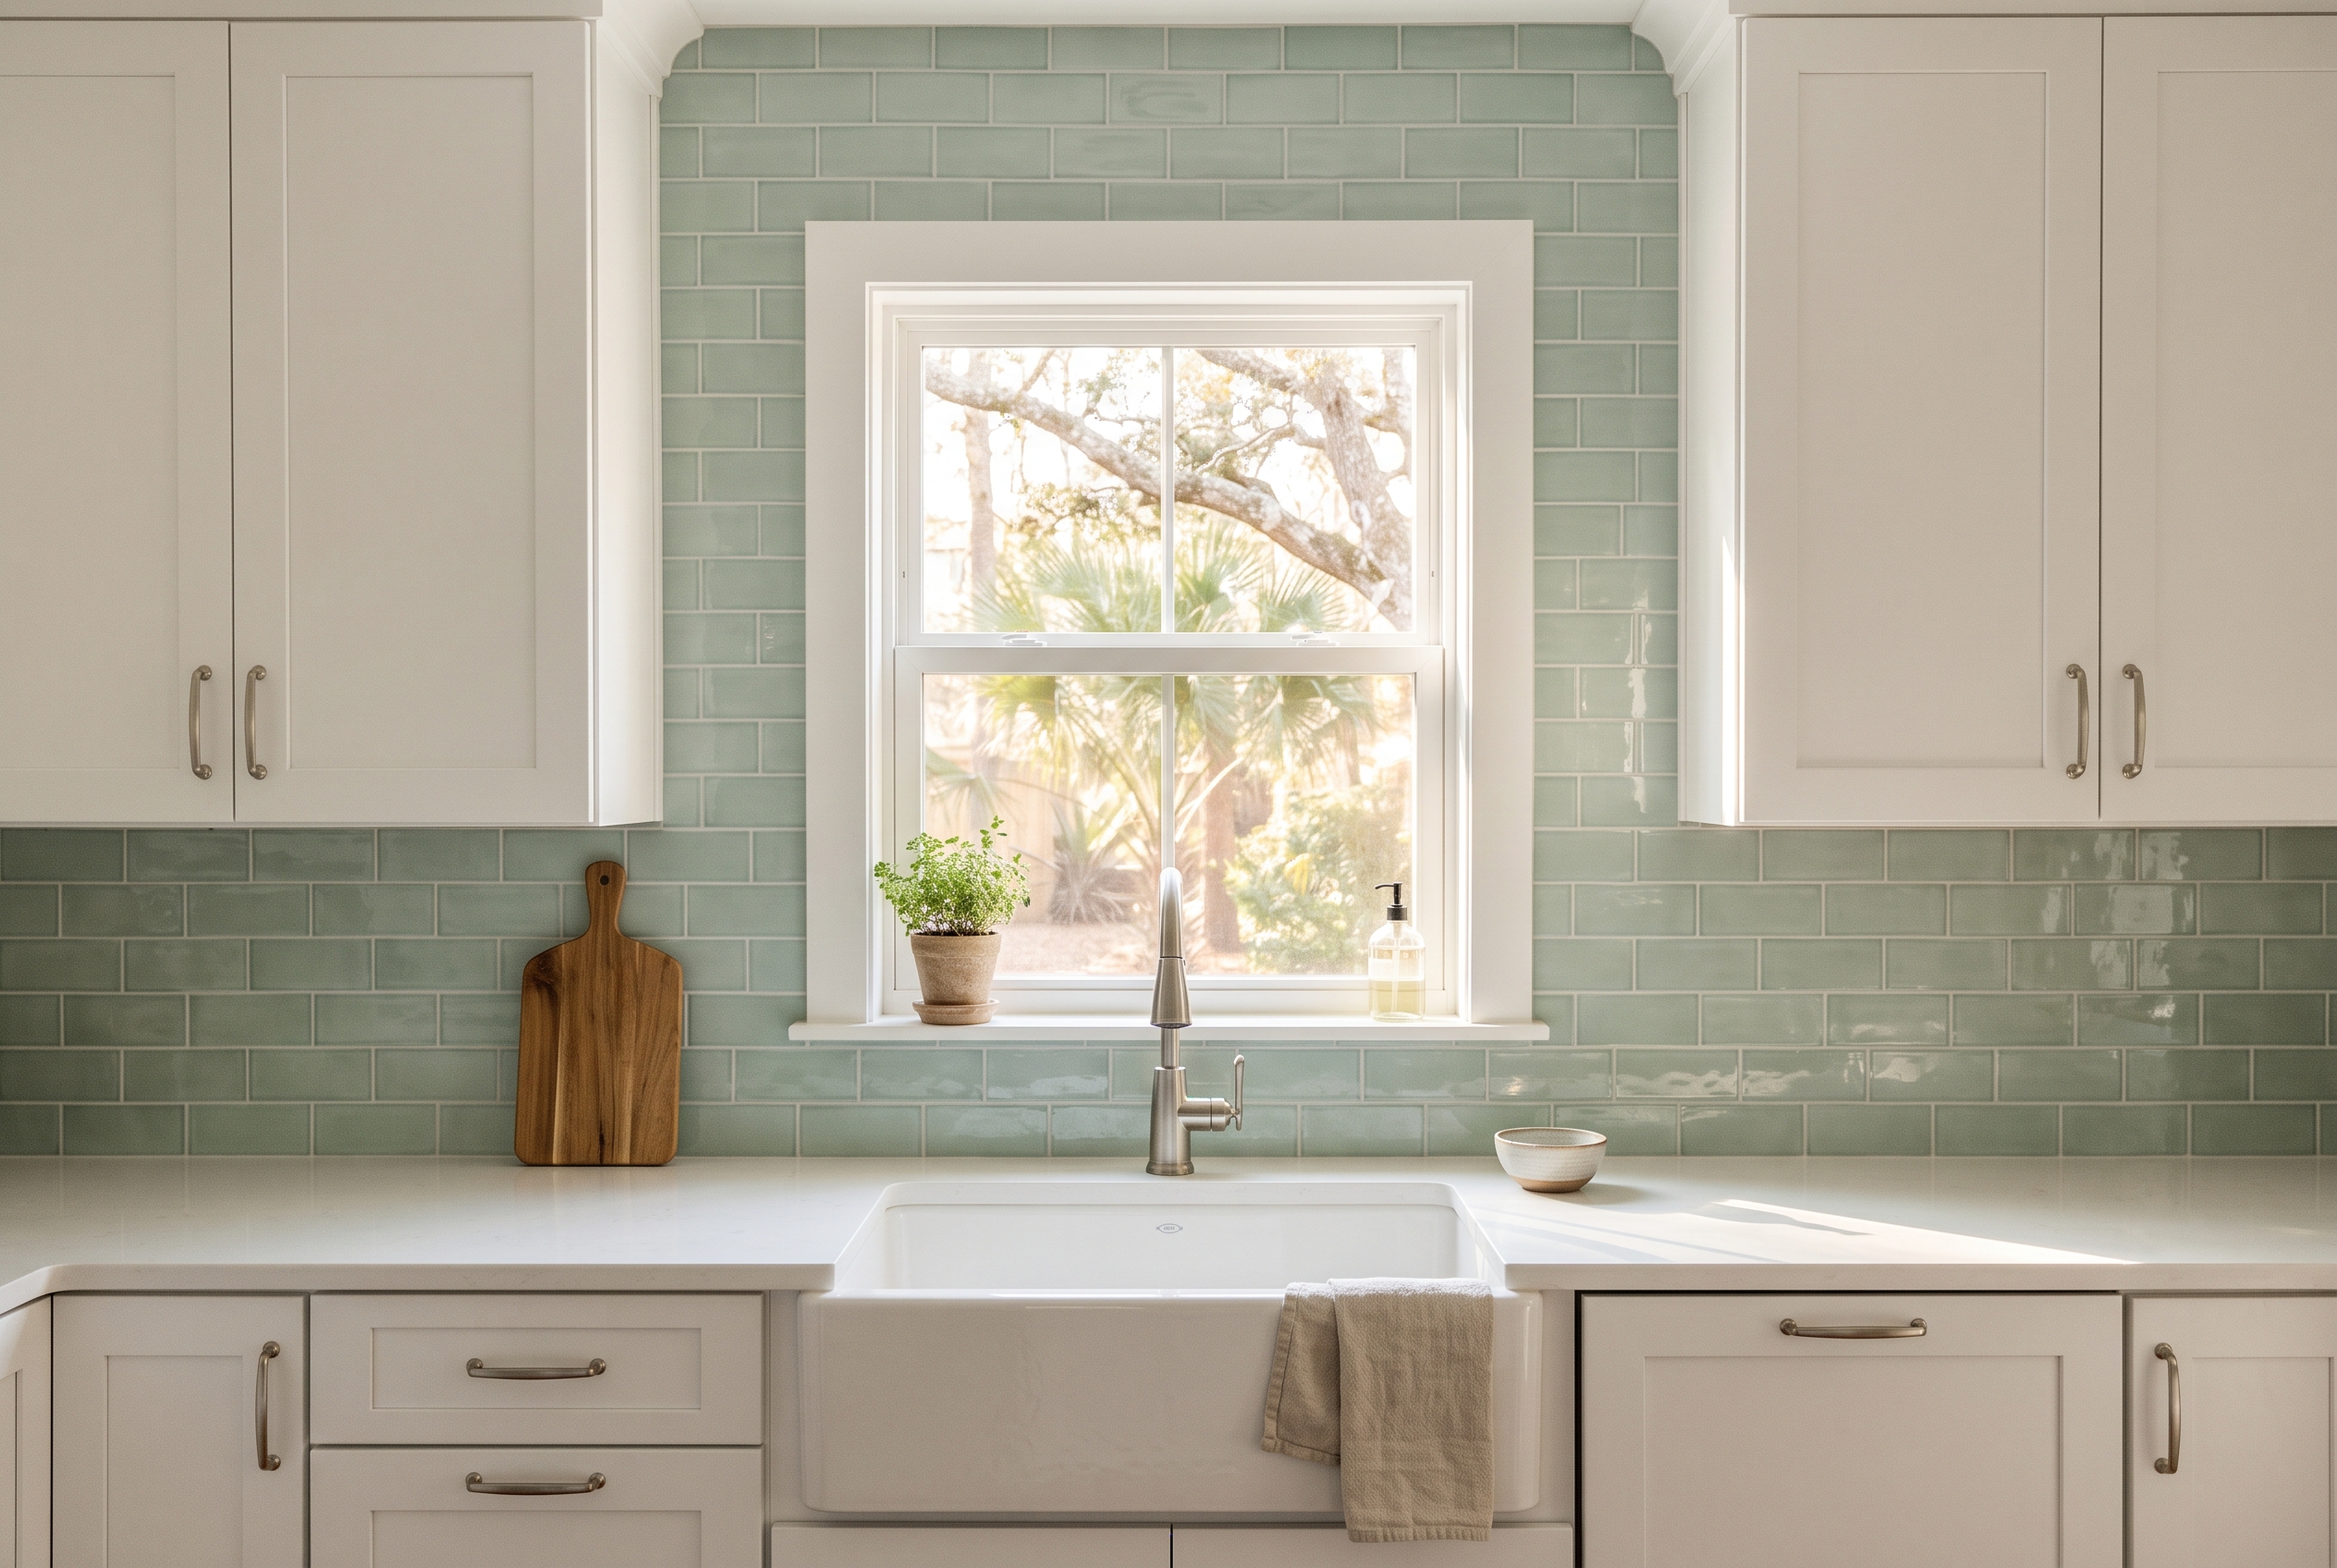
Choose the backsplash after the countertop, and let the countertop set how loud the tile can be. A granite with a lot of movement wants a quiet tile, while a plain quartz or white cabinets can carry color, texture or a pattern. Then pick for the wall behind the range, where grease and heat land. Glazed ceramic or porcelain with a stain-resistant grout handles it best, and glass, stone and handmade tile are looks you choose knowing the care each one asks.
| Backsplash tile | Best for | Behind the range | Installed cost |
|---|---|---|---|
| Glazed ceramic | Most kitchens, best value | Wipes clean | Lowest |
| Porcelain | Large tiles, stone looks | Toughest; no sealing | Low to middle |
| Glass | Light, color, shine | Fine; shows smudges | Middle |
| Marble and stone | One-of-a-kind looks | Seal it; acids etch | Highest |
| Brick and brick-look | Texture, farmhouse, cottage | Glazed look-alike is easier | Middle |
Start With the Countertop and the Cabinets
If your countertop is busy, keep the tile quiet. A granite or quartzite with strong veining is already the feature, so a backsplash that pulls one of its quieter colors lets both look good. If the countertop is plain, such as a solid quartz or a white counter under white cabinets, the tile can lead with a color, a texture or a pattern.
MSI's trade tips make the same point from the tile side: a patterned wall tile can liven up a plain counter, and a dramatic stone needs a backsplash that doesn't compete with it. Undertone matters more than an exact match. A creamy tile next to a cool gray quartz looks dingy, and a bright white tile next to a warm beige granite looks blue.
To test a choice, hold tile samples against a countertop sample or a photo of the actual slab. Then tape two or three tiles to the wall where the backsplash will go. Look at them in the morning, at dinner and at night under the cabinet lights, since those are the times you'll see the wall.
The floor doesn't need to match the backsplash. It sits too far away for the eye to compare them closely, and the countertop sits between the two. If you haven't chosen the countertop yet, choose it first, since a slab is harder to change than a tile.
Backsplash Tile Materials Compared
For most kitchens, glazed ceramic or porcelain is the right backsplash, because both wipe clean and neither needs sealing. Glass, marble and other stone, brick and metal are looks you choose on purpose, and each asks for something in return.
Ceramic and Porcelain Tile
Glazed ceramic is the default backsplash for good reason. Its glazed face shrugs off splashes and grease, it comes in more colors and shapes than any other tile, and it costs the least to buy and to install. MSI calls glazed ceramic the best value for everyday cooking and porcelain the most durable backsplash it makes.
On a wall, the difference between them matters less than on a floor. A backsplash doesn't take foot traffic or standing water, so ceramic's softer body, which is easier to cut around outlets, often wins. Porcelain absorbs half a percent of its weight in water or less, and that density makes it the pick for large tiles, marble and stone looks, and the busiest cooking walls.
Any tile rated for walls is enough for a backsplash. You don't need a floor rating, and a glossy wall tile that would be slippery underfoot is fine here.
Glass Tile
Glass tile brightens a kitchen, because it reflects the window and the under-cabinet lights, and nothing soaks into it. The trade-off is that fingerprints, water spots and streaks show more on glass than on glazed ceramic, especially glossy glass near the sink. A frosted or matte glass hides them better.
Glass also asks more of the installation. You can see through it, so it goes on white thinset to keep a gray setting bed from showing. It takes a non-sanded grout, since sand scratches polished glass, and it's cut wet. The exposed edges at the end of a glass backsplash need a finished piece or a trim.
Behind a range, glass is fine. The heat of a home cooktop doesn't hurt it, and grease wipes off its surface easily. Glass tile in our catalog comes in slim subway shapes, mixed-size mosaics, and brick-joint and straight-joint sheets.
Marble and Other Natural Stone
Marble, travertine and other natural stone give a backsplash a look no factory can copy, and they're also the most upkeep. Stone is porous, so it needs sealing, and the Natural Stone Institute warns that lemon, vinegar and other acids can dull or etch calcium-based stones such as marble and travertine.
Near the cooktop, tomato sauce, a squeeze of lemon or a vinegar spray can leave dull spots on polished marble. A honed finish hides etching better than a polished one. Sealing helps, but it makes stone more stain resistant rather than stain proof, so wipe splatters the same day.
If you love the look but not the upkeep, porcelain made to look like marble gives you the veining without the sealing. If you want the real thing, marble mosaics sized for a backsplash, from 1-inch hexagons to small herringbone, are in our natural stone catalog.
Brick and Brick-Look Tile
A brick backsplash gives a kitchen warmth and texture, and it suits farmhouse and coastal cottage kitchens. The look comes from thin slices of real fired brick, or from ceramic and porcelain tile made in brick shapes and colors.
Real thin brick is porous and rough, so behind a range it needs a sealer, or grease soaks into the brick and the mortar joints. A glazed brick-look tile wipes clean like any other ceramic, which makes it the easier choice right behind the cooktop. Some kitchens use real brick on the open walls and brick-look tile where the cooking happens.
Either way, the joints are wider than on subway tile and read as mortar. Choose the joint color with the brick, because a gray joint and a white joint make the same brick look like two different walls.
Metal, Mosaics and Handmade Tile
Small mosaics carry a lot of grout, which means more texture and more lines to keep clean behind a range. They're at their best as a band, a panel behind the cooktop or a backsplash in a kitchen that does little frying.
Metal tile works best as an accent strip or a band behind a cooktop, since a whole wall of it shows fingerprints. Handmade and handmade-look tile is irregular on purpose, with edges that vary, faces that wave and glaze that pools. Under-cabinet lights skim across a backsplash at a low angle and exaggerate every bump, so look at a handmade sample under a light held close to the wall before you commit.
Tile Size and Pattern on a Backsplash
The classic 3x6 subway tile shows about six courses on an 18-inch backsplash, which reads traditional and tidy. Longer tiles, such as 2x8, 3x12 or 4x12, look more current and cut the number of grout lines. Large tiles and panels give the fewest joints, but they waste more tile around outlets and windows.
A half offset, the brick pattern, is the forgiving default for subway tile. A straight stack looks modern, but it needs straight walls and dead-level cabinets, because every joint lines up with them. A vertical stack makes a short wall look taller, and a herringbone works as a feature panel behind the range.
Before you decide, lay a row of tile on the countertop against the wall in the pattern you want, and look at it from the kitchen doorway.
How High Should a Backsplash Go
A backsplash usually runs from the countertop to the bottom of the upper cabinets, which hang about 18 inches above the counter in most kitchens. That height fills the wall, protects it from splashes, and gives the tile a clean top edge under the cabinets.
With no upper cabinets, or on a wall with open shelves, stop at a natural line. That might be the height of the window sill or a shelf, the height of the backsplash on the next wall, or the ceiling. Tile to the ceiling looks deliberate and finished. It uses more tile, but the labor rises less than the square footage, since the cutting around outlets stays the same.
Behind the range, run the tile up to the hood, or to the ceiling as a feature. The 4-inch strip that comes with many countertops is the countertop's own splash, not a tiled backsplash, and you can tile above it or order the countertop without one.
Where a Backsplash Should Stop at the Sides
Stop the backsplash where the upper cabinets stop, flush with the outside edge of the cabinet, even when the countertop runs farther. The eye reads the cabinet line from across the room, so a backsplash that ends with it looks planned.
Other walls call for other stops. Where no cabinet hangs over the counter, run the tile to the corner or stop it at the end of the counter. At a window, either wrap the tile into the window's return or stop it at the outside of the casing. Behind the refrigerator, the tile only needs to go as far as what shows.
The exposed edge needs a finished end, such as a bullnose tile, a slim pencil liner or a thin metal edge trim over the cut edge. Before the tile goes up, tape the outline on the wall and look at it from the doorway.
Behind the Range and the Sink
Behind the range, the work is grease more than heat. Ceramic, porcelain and glass don't mind the heat of a home cooktop, and porcelain takes even the direct heat of the stovetop. What builds up is a film of grease and spatter, so the best range wall has a glazed surface, narrow joints and a stain-resistant grout.
Unsealed stone is the hardest material to keep there, because cooking splatter soaks straight into it. Textured tile and wide joints hold grease too. A smooth, glazed tile with a mid-tone or darker grout looks clean the longest.
Behind the sink, the work is water. The tile itself doesn't mind it, but the joint where the tile meets the counter takes splashes every day and needs a flexible sealant. To clean grease off tile, use warm water with a little dish soap and a soft sponge, then rinse. On stone, use a mild, non-acidic cleaner made for stone.
Choosing Grout for a Backsplash
Behind a range on ceramic or porcelain, choose an epoxy or other stain-resistant grout. MSI advises epoxy grout for tile in a busy kitchen, because white cement grout stains over time near the burners. A cement grout can still work in a quieter kitchen, as long as it's sealed and kept up.
Glass mosaics are the exception: MSI's mosaic guide calls for non-sanded grout on them and doesn't recommend epoxy on glass mosaics unless the tile's maker specifies it. For any tile, joints under 1/8 inch take unsanded grout, and joints of 1/8 inch and wider take sanded grout.
For color, a grout that matches the tile quiets a pattern and hides small irregularities, while a contrasting grout draws every line. A mid-tone grout hides cooking grime best. To choose, lay two or three tiles on grout color samples in your kitchen's own light.
What Installing a Backsplash Involves
Installing a backsplash starts after the countertop is in, because the tile sits on it. The tile takes about a day to set and a second day to grout, caulk and seal, and the steps run like this:
- Cover the countertop and the range, and turn off the power to the outlets on that wall.
- Take off the old backsplash and patch the wall, or prepare the old tile to be tiled over.
- Plan the layout from the center of the range or the window, and set the bottom course on a level line.
- Bring the outlet boxes out to the new tile face with box extenders where needed.
- Set the tile in thinset, or in a premixed adhesive for small tile on a dry wall.
- Grout once the setting bed is firm, usually the next day.
- Seal the joint at the countertop and the inside corners with a flexible sealant, and seal cement grout or stone if they need it.
The outlets are the step people forget. Under the National Electrical Code, an outlet box in a tile wall can sit back no more than 1/4 inch from the face of the tile. A backsplash that adds more than that needs a box extender to bring each outlet forward.
The wall behind the tile matters too. Sound drywall in a dry kitchen is an accepted base for ceramic and porcelain tile, as long as it's clean, flat and free of grease. MSI's guide for its mosaics is stricter and asks that its mosaics not go directly on drywall or plywood, so for mosaic sheets the instructions in the carton decide what goes on the wall first.
Choose the adhesive by the tile: a premixed tile adhesive is for small tile on dry interior walls. Tile 15 inches or longer goes in a mortar made for large tile, and glass goes in white thinset.
Tiling Over an Old Backsplash
You can tile over an old backsplash when the old tile is solid, flat, clean and a single layer. Tap every tile with a screwdriver handle, and if one sounds hollow or moves, it comes off. Old glazed tile is scuffed and cleaned before new tile goes on, so the new adhesive has something to grip.
Depth is the catch. A second layer pushes the face of the backsplash out, so the outlets need longer extenders, the tile may stand proud of the window trim, and the edge at the end of the counter gets thick. When those add up, taking the old tile off is the cleaner job, even though it usually damages the drywall behind it, which then gets patched.
Caulk, Not Grout, Where the Tile Meets the Counter
The joint where the backsplash meets the countertop is a movement joint, and it gets a flexible sealant rather than grout. The countertop and the wall move a little differently as the house heats, cools and settles, and a rigid grout line between them cracks.
The Tile Council of North America's installation handbook calls for sealants such as silicone, urethane or polysulfide at these joints. Acrylic latex and siliconized latex caulks dry hard, shrink and pull out, which is where the familiar crack between tile and counter comes from. Inside corners, where two walls meet, get the same sealant.
To fix a cracked line, cut out the old grout or caulk, clean the joint, and run a color-matched silicone or urethane sealant in its place.
Doing a Backsplash Yourself
A straight subway backsplash on flat walls is a reasonable first tile job. You need a tile cutter or a wet saw, a notched trowel, spacers, a level, a grout float and sponges, and a weekend, with the grout going in on the second day.
Glass, stone, large tiles, herringbone and full-height walls are harder. First-timers usually trip on outlets that end up recessed, a bottom course that follows a counter that isn't level, and a backsplash end with no finished edge. Set the bottom course on a level line, not on the counter, and plan the outlets and the edges before you mix any thinset.
What a Tile Backsplash Costs
Nationally, a tile backsplash runs about $15 to $40 a square foot installed for most jobs, in cost data gathered from homeowners after their projects were finished. Labor alone runs about $5 to $20 a square foot, and a typical 30-square-foot backsplash comes to about $420 to $1,400, with an average near $840.
| Tile | Installed, per sq ft | A 30 sq ft backsplash |
|---|---|---|
| Ceramic | $12 to $32 | $360 to $960 |
| Porcelain | $14 to $28 | $420 to $840 |
| Marble | $30 to $150 | $900 to $4,500 |
To size your own wall, multiply the height by the width of each stretch of counter, add the stretches together and add about 10 percent for cuts, all from one production run. If you're doing it yourself, the tile runs about $4 to $15 a square foot for glazed ceramic and $2 to $15 for porcelain. That puts 33 square feet of ceramic at about $130 to $500 before thinset, grout and tools.
Several lines add to a backsplash quote. Taking off an old backsplash runs about $3 to $6 a square foot, disposal included. Box extenders, edge trim, a full-height wall and an intricate pattern such as herringbone all add too, and an intricate layout can run up to about double the hourly rate of a straightforward one. We price your wall when we measure it, because its size, its outlets and windows, and the tile you pick are what move the total.
When a Backsplash Goes Wrong
A crack running along the line where the tile meets the counter is the most common backsplash problem. It means that joint was grouted, or caulked with a latex caulk, and it moved. Cut it out and replace it with a silicone or urethane sealant.
Dark, greasy grout behind the range comes from cooking spatter soaking into cement grout. Scrub it with a degreasing cleaner and a stiff nylon brush, rinse it, and let it dry before sealing it or evening it out with a grout color sealer. If it won't come clean, the grout in that panel can be raked out and replaced, ideally with an epoxy grout.
A tile that sounds hollow or moves has lost its bond, usually because the wall wasn't clean or the adhesive didn't cover the back. It comes off and is reset, and the leftover box from the job means a matching tile. A chipped glass edge is replaced the same way, and an outlet sitting deep inside the tile needs a box extender, with the power off first.
Questions We Get About Backsplashes
Does the backsplash go in before or after the countertop?
The backsplash goes in after the countertop. The countertop is templated, made and installed first, and the tile sits on top of it, so tile set first leaves a gap or an uneven bottom edge.
If you're replacing both, plan for the counters first and the tile a few days later.
Do the same rules apply to a bathroom vanity backsplash?
Yes, mostly. A vanity backsplash is often the 4-inch strip that comes with the vanity top, or a tiled wall between the vanity and the mirror, and the faucet splashes it all day.
Glazed ceramic, porcelain and glass all handle it. Seal the joint at the vanity top with silicone, the same as at a kitchen counter.
Is peel-and-stick tile worth it?
For a rental or a short-term refresh, peel-and-stick can change a kitchen in an afternoon, but it isn't tile. It's a vinyl or composite sheet with an adhesive back, so it doesn't take the heat behind a range the way ceramic does, and it doesn't last like tile.
If you go that way, keep it away from the cooktop and read the product's heat and cleaning limits first.
Should the backsplash go on every wall of the kitchen?
Tile every wall that has a countertop against it, since that's where splashes land. Walls with no counter, such as the wall beside the refrigerator or around a doorway, usually stay painted, and the backsplash stops at the cabinet line or the corner.
A coffee bar or a desk counter can take its own small backsplash in the same tile.
Backsplash Tile and Installation With Us
At Waccamaw Floor Covering, we design and install tile and brick backsplashes and accent walls, alongside the custom tile showers we build. You choose the tile, and we handle the job from selection through installation.
In our tile catalog, MSI's subway lines run from 2x6 ceramic such as Carbonita to beveled subway such as Crisson and Evergreen, and its glass subway includes Artic Ice at 4x12 and Opalina at 2x6. Daltile's Color Wave glass comes in brick-joint and straight-joint mosaics.
For a brick look, there's American Olean's Conrad Brick at 2x8 and Emser Tile's Hues brick at 3x10. The marble mosaics include Arabescato Carrara and Calacatta 1-inch hexagons and Athena Gold 2-inch hexagons. Samples ship free, and every tile has a See in my room button that puts it into a photo of your own kitchen.
Among the photos of finished jobs is a kitchen backsplash our crews set in Loris. Our showroom is at 1717 4th Avenue in Conway, open weekdays from 8 to 5, and if a tile cracks or works loose later, we repair and replace tile too.
When you're ready, we come out, measure the wall, look at the outlets and the edges, and price the tile you picked.
Bringing Your Countertop Sample In
Bring your countertop sample, or a photo of the slab, when you stop in, or have it ready when we come to measure. We'll hold tiles against it with you, measure the backsplash and price the one you choose.


