


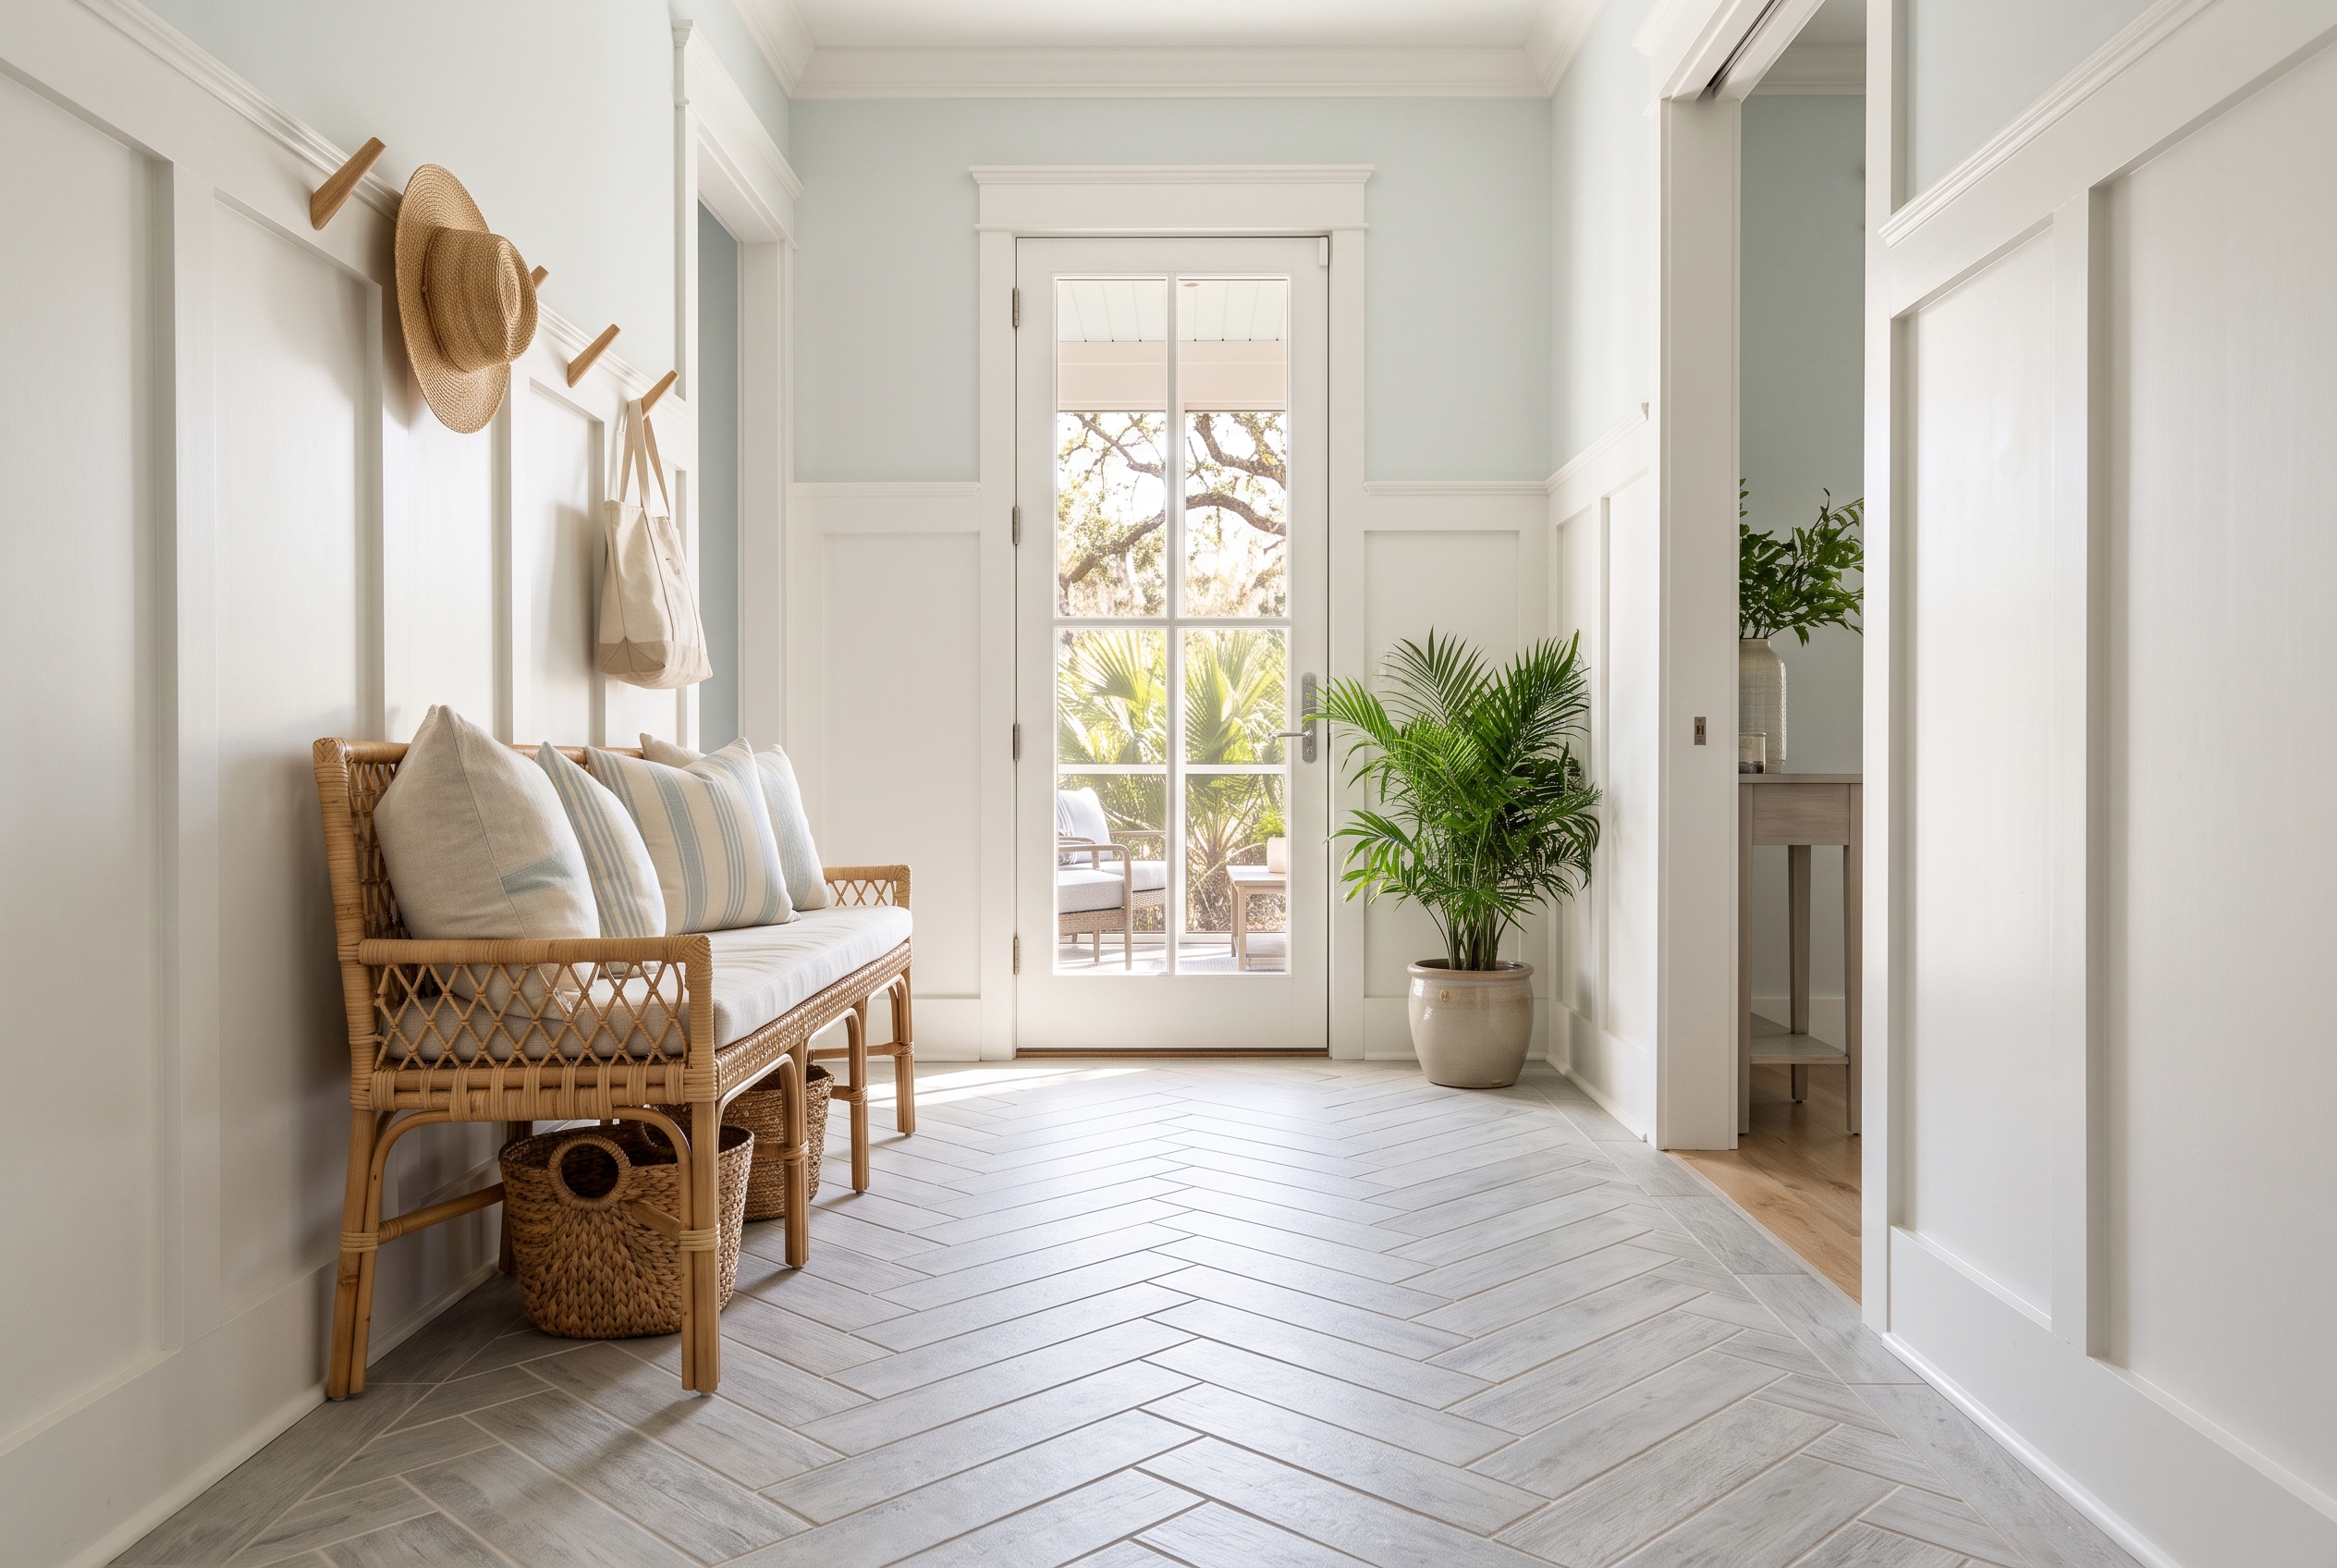
Your tile picks most of its own patterns before you do. Square tile goes in a grid or on the diagonal, and rectangles and planks are stacked or staggered, by no more than a third of their length once they pass about 15 inches. Herringbone and basketweave need a rectangle at least twice as long as it is wide. Among the patterns your tile allows, the room settles the rest: where you see it from, how big it is and whether the floor slopes to a drain.
| Pattern | Tile it needs | How it looks | Labor and extra tile |
|---|---|---|---|
| Straight lay (grid) | Squares or rectangles, ideally rectified | Calm and modern | Lowest; about 10% extra |
| Stack or soldier stack | Slim rectangles with straight edges | Clean rows or tall columns | Low; about 10% extra |
| Half offset (running bond) | Small rectangles such as subway | Classic brick look | Low; about 10% extra |
| One-third offset | Long tiles and planks | Moves the eye down the room | Low; about 10% extra |
| Diagonal | Squares | Hides an out-of-square room | Higher; about 15% extra |
| Herringbone | Rectangles, 2 to 1 or longer | Zigzag with the most movement | Highest; 15% or more |
| Chevron | Tile made with angled ends | Unbroken arrows | High; 15% or more |
| Basketweave | Exact 2 to 1 pieces, usually on sheets | Woven, vintage | Moderate on sheets |
Straight Lay and Stacked Tile Patterns
In a straight lay, every grout joint lines up in both directions, and the floor reads as a calm grid. On a wall, the same idea is called a stack bond. It suits large squares and rectangles in modern rooms, and it is the least forgiving pattern there is, because a long, unbroken joint shows any wall that isn't square.
It also shows any tile that is a hair bigger than its neighbor. So a tight straight lay is usually done with rectified tile, which is ground to an exact size after firing. Calibrated tile keeps its factory edges, varies more from piece to piece, and needs a wider joint to keep the lines straight.
On a wall, a horizontal stack of subway tile looks crisp and current. It only works above countertops and cabinets that are dead level, though, since every joint runs parallel to them and any slope shows.
Soldier Stack and Vertical Stack Tile
Soldier stack is a stack bond turned on end. Rectangular tiles stand upright in straight columns, with every joint lined up from top to bottom. It pulls your eye upward, so a shower wall, a fireplace surround or a short backsplash looks taller, and it is at its best with long, slim tiles such as 2x8, 3x12 or 4x12.
Each column has to be plumb, because a column that leans even slightly shows across the whole wall. The wall has to be flat, too, or the long vertical joints wave. The layout starts from a plumb line at the center of the wall, or at the niche or window that anchors it, so the cut columns at the two ends come out the same width.
If you're torn between a stack and an offset, Daltile's Color Wave glass tile comes both ways: a straight-joint mosaic that stacks and a brick-joint mosaic that staggers. Holding the two side by side against your own wall answers the question quickly.
Offset and Running Bond Tile Patterns
In an offset pattern, each row shifts so its joints land partway along the tiles in the row before it. A half offset is the familiar running bond, or brick pattern. A one-third offset shifts each row by a third of a tile, a quarter offset gives a gentler stagger, and a random offset imitates a wood floor.
A half offset is the natural pattern for small rectangles, such as 3x6 subway and 4x12 wall tile. It is forgiving, because no joint runs all the way across the wall to show a small difference in size. A quarter offset looks quieter and more modern, and long floor tiles and wood-look planks follow rules of their own.
Whatever the offset, it stays the same across the whole floor. A marked tile or a gauge stick sets the stagger for each row, and a straightedge laid across the rows every few courses catches any creep before it shows.
Why Long Tiles Get a One-Third Offset
Tiles longer than about 15 inches on the side being staggered get an offset of a third or less, never a half. ANSI A108.02, the national standard for how tile is installed, caps the offset for those tiles at 33 percent unless the tile's maker says otherwise, and a bigger offset needs a mock-up the owner approves first.
Long tiles come out of the kiln with a slight bow along their length, so the middle sits a hair higher or lower than the ends. In a half offset, the middle of every tile lands beside the ends of the tiles in the next row, right where that difference is biggest. You feel it as a raised edge under bare feet, and the trade calls it lippage.
Moving the joint a third of the way along keeps each tile's high point away from its neighbor's low point. On a 12x24 tile, a third is 8 inches; on a 24x48 tile, it is 16 inches; and on a 6x36 plank, it is 12.
Plenty of pages still quote 18 inches as the cutoff, which is older wording of the same rule. Your tile's own instructions may call for a smaller offset still, and the instructions in the carton are what count for that tile. The same standard widens the joint on long tiles, too: an average of at least 1/8 inch for rectified tile and 3/16 inch for calibrated tile, plus however much the tile is bowed.
Patterns for Wood-Look Plank Tile
Wood-look plank tile looks like a wood floor when its end joints are staggered the way a carpenter staggers boards. That means irregularly, never in a repeating stair-step, and never with two ends side by side in neighboring rows. MSI's guidance for plank tile is a 33 percent offset and a 1/8-inch grout joint, with 1/16 inch possible.
A random stagger looks the most like real wood, but it has one zone to avoid. An end joint that lands between a third and halfway along the plank beside it brings back the lippage the one-third rule prevents, so a random layout is still planned plank by plank.
Marazzi's installation guide asks for tiles to be mixed from several cartons as they're set, for a blended effect. On a wood look, that spreads the light and dark boards and the repeated grain prints across the room. A grout close to the tile's color finishes the illusion.
Herringbone and Chevron Tile Patterns
Herringbone sets rectangles with square ends at right angles. The end of each tile butts against the side of the next, and the rows form a zigzag of broken V shapes. Chevron uses tiles with ends cut at an angle, so they meet point to point in an unbroken line. Side by side, herringbone looks woven and chevron looks like a row of arrows.
Plain rectangles work for herringbone, and the classic proportion is a tile two to three times as long as it is wide. Small herringbone often comes already set on mesh sheets, in pieces from 1x2 to 2x4. Chevron needs tile made with angled ends, such as MSI's Blue Shimmer glass, because cutting chevrons from plain rectangles means an angled cut on every piece.
The zigzag can run square to the walls, with the points of the V's lined up down the room, or turn 45 degrees, the way old wood parquet was laid. Either way, it is set from one center control line through the focal point, such as the view from the front door or the middle of a shower wall. The rows get checked against that line every few courses, because a herringbone that drifts a little at the start is visibly crooked by the far wall.
Big tile goes in herringbone too. A 12x24 porcelain or a wood-look plank in herringbone makes a bold floor in an entry or a great room. The zigzag is large, though, so it needs a big room to read as a pattern and a floor flat enough for long tiles. Every edge of the room gets angled cuts. Plan on about 15 percent extra tile, against about 10 for a straight lay, and on labor toward the top of the national range.
A border of straight tiles, or a row set on end around the edge, gives the zigzag a clean place to stop. Herringbone wood floors, such as red oak herringbone, use the same geometry, though the boards, the glue and the finishing make them a hardwood job of their own.
Diagonal, Basketweave, Versailles and Other Classic Patterns
Diagonal, basketweave, pinwheel and Versailles are older patterns, and each belongs to a particular tile. Most now come pre-set on mesh sheets. Hexagons, arabesques, fish scales and other shaped tiles carry their own pattern, and the only choices left are where it starts and how the edges are cut.
Diagonal (Diamond) Tile
A diagonal layout turns square tile 45 degrees to the walls, so the grid reads as diamonds from the door. Its real gift is hiding a room that is out of square: no grout line runs parallel to a wall, so your eye has nothing to compare when one wall wanders. Many designers also say a diagonal makes a small room look bigger, while others find it busy in a tiny bath, and that part is taste.
A diagonal costs more than a straight lay, because every tile along every wall is cut into a triangle. Expect more cutting time and about 15 percent extra tile, and more again in a room with a lot of corners, cabinets or a tub.
The layout starts from the room's center lines, with a second pair snapped at 45 degrees through the same point. The goal is triangles at the walls of about half a tile. Many diagonal floors get one row of straight tiles around the edge as a frame, which tucks the cut triangles behind a clean border.
Basketweave, Pinwheel and Checkerboard
Basketweave sets pairs or trios of rectangles side by side and alternates their direction square by square, so the floor looks like woven cane. Each rectangle has to be two or three times as long as it is wide, joint included, and that precision is the reason nearly all basketweave is sold as mosaic sheets.
Pinwheel, also called hopscotch, frames a small square with four larger tiles that turn around it. Checkerboard is two colors in a straight grid. All three give a bathroom, a laundry room or an entry an early-1900s look, and all three carry a lot of grout, which on a floor means more lines to keep clean.
On sheets, the joints between sheets have to match the joints inside them, or the edge of every sheet shows as a faint grid. The sheets are laid out dry first, and a border around the room gives the woven field a straight edge to end on.
Versailles and Other Multi-Size Patterns
A Versailles pattern, also called a French pattern, repeats a module of four or more sizes of squares and rectangles: the look of an old limestone floor in a French country house. You buy it as a pattern set, or from a collection that makes every size in one finish, and it is laid from a printed plan of the module.
The module needs room to repeat, so it looks best in a large kitchen, a great room or a covered porch, in stone or stone-look tile with a matte or tumbled finish. Expect a little more waste than a straight lay, since the module rarely ends cleanly at a wall.
Which Tile Pattern Makes a Room Look Bigger
If your room is a small bathroom or a narrow hall, the patterns with the fewest visible lines make it look larger. Use the largest tile the room allows, a grout close to the tile's color, and a straight lay or a one-third offset, which keep your eye moving across the floor without stopping at every joint.
Direction helps as much as pattern. In a narrow hall, running the long side of the tile down the hall makes it look longer, and running it across makes it look wider. On a wall, a vertical stack makes a low ceiling feel taller.
Diagonal and herringbone are where opinions split. Both add movement, which reads as more floor in a large room and as busyness in a small one, and designers argue both ways. Before you decide, lay eight or ten loose tiles on the floor in the pattern you're considering and look from the doorway, where you'll see the room every day.
Choosing a Tile Pattern Room by Room
Pick a pattern for what the room does and where you see it from. In a kitchen the cabinets set the lines, and in a bathroom the view from the door sets the start. In a shower the slope limits the tile, and in an entry the pattern is the first thing a guest sees.
Kitchen Floors
A kitchen floor usually looks best in a straight lay or a one-third offset, with the long side of the tile running the length of the room or the main run of cabinets. Busy patterns tend to fight a kitchen, because the long, straight lines of the toe-kicks and the island show every joint that isn't parallel to them.
Center the pattern on the island and on the view from the main doorway, since that is what you see. The cuts then land under the toe-kicks and along the cabinet faces, where shadow hides them, and the full tiles land where you stand.
When the kitchen opens to a living room or a breakfast area, carry the pattern and the direction straight through. A laundry room or mudroom off the kitchen follows the same rule, and any change of pattern waits for a doorway.
Bathroom Floors
A small bathroom floor looks best in a straight lay or a one-third offset in the largest tile the floor allows, centered on the view from the door and on the vanity rather than the toilet. In a room that small, where the cuts fall matters as much as the pattern, so the tiles you see first should be whole. Large tile is fine in a small bath, as long as the floor is flat enough for it.
A bathroom can carry one feature, and the floor is a good place for it. A herringbone or a basketweave under a plain vanity and simple wall tile looks deliberate, while a patterned floor under patterned walls looks crowded.
Mosaic sheets are the other good answer in a small bath, because they turn around a toilet flange and a vanity base with small cuts. Their extra grout lines also give your feet a little more grip.
Shower Floors and Shower Walls
A shower floor slopes to its drain, at least 1/4 inch per foot. With a center drain, that means the floor is pitched in four directions at once, and only small tile or mosaics bend to that shape. Large tile on a shower floor works with a linear drain along one wall, because the whole floor can then slope in a single plane.
Shower walls take whatever pattern you like. A vertical stack on the back wall makes the shower feel taller, a herringbone panel behind the shower head becomes the feature, and continuing the floor tile up one wall makes a small shower look bigger. The grout lines are planned to land cleanly at the niche, the bench and the valve, so a shower layout is drawn before any tile is cut.
For the floor itself, porcelain absorbs half a percent of its weight in water or less, which makes it the usual shower floor tile. We build custom tile showers and backsplashes on the Schluter shower system, and we choose the pattern along with the waterproofing, the drain and the niche.
Backsplashes and Accent Walls
Backsplashes are short walls broken up by outlets, windows and cabinets, so simple patterns read best on them. A half offset suits small subway tile, a stack suits long, slim tile, and a soldier stack makes a short wall look taller. Herringbone works as a feature panel behind the range, where it has a clear frame.
An accent wall in a living room or behind a bed is the opposite: a large, unbroken surface where a bold pattern, a chevron or a brick look has room to read. The grout color does as much work there as the pattern does.
Entries, Hallways and Open Floor Plans
Entries are where a feature pattern earns its place. A herringbone or a bordered tile "rug" inside the front door gives the house its first impression, and it stops at a natural edge, the line where the entry meets the next room.
A hallway usually runs the long way, which carries your eye through the house. In an open floor plan, one pattern and one direction run through the whole space, and the pattern changes only at a doorway or another clear break, where the change looks planned.
Where tile meets carpet, wood or vinyl, the transition sits centered under the door, so each room sees only its own floor when the door is closed. The heights of the two floors set which transition piece goes there.
Which Direction Should Floor Tile Run
Run the long side of the tile toward the main view, the line you see from the front door or along the longest stretch of the room. When there's no obvious view, run it parallel to the longest wall.
In a lot of homes here, the main view is out the back, to a porch, a yard or the water. A floor that runs toward those windows pulls you through the room the way the house was meant to be seen, and planks running across that line look like a fence.
Keep one direction across connected rooms, so the floor reads as one floor. To check, stand at the front door and then at the kitchen sink, and lay strips of painter's tape on the floor in each direction you're considering.
How a Tile Layout Is Planned Before the First Tile Is Set
A tile layout is planned from the middle of the room outward, never from the wall where setting starts, because walls are rarely straight or square. A patterned floor is planned like this:
- Find the line that matters: the view from the front door, the center of the vanity, the middle of the island or the main cabinet run.
- Snap two center lines across the room and square them with a 3-4-5 triangle. Mark 3 feet along one line and 4 feet along the other, and the distance between the marks should be 5 feet.
- Dry-lay a row of tile in each direction out to the walls, with spacers for the grout joint.
- Shift the lines until the cuts at opposite walls match and none is less than half a tile. A sliver at a doorway is the cut everyone notices.
- Check the floor with a long straightedge, then level low spots and grind high ones where it falls short.
- Set the joint width the tile calls for, wider for long, bowed tiles.
- Line the pattern up through each doorway and plan where the transitions land.
Flatness is the step that separates a small-tile floor from a large-tile floor. Under ANSI A108.02, a floor getting tile with all edges under 15 inches can vary up to 1/4 inch over 10 feet. For tile with any edge 15 inches or longer, the limit tightens to 1/8 inch over 10 feet and 1/16 inch over 2 feet.
A slab or a wood subfloor that is fine for small tile often needs leveling before large tile goes down. During setting, plastic leveling clips at the corners hold large tiles flush while the mortar cures. On a patterned floor, the planning and leveling are where most of the hours go, and they're the part of the job you can't see once the tile is down.
Grout Color and Joint Width for a Tile Pattern
If you picked a pattern to be seen, such as a herringbone or a stacked subway wall, a grout that contrasts with the tile draws every line of it. If the tile carries the look, such as marble, stone or wood-look planks, a grout close to the tile's color lets the pattern sit quietly behind it.
Floors add a second question, which is dirt. White grout on a kitchen or entry floor darkens in the traffic paths, and a contrasting grout shows any line that wanders. A mid-tone grout, a shade darker than a light tile or lighter than a dark one, hides both.
Keep the joint as narrow as the tile allows. Small rectified tile can go as tight as 1/16 inch, and long tiles get the wider minimums that come with the one-third rule. Joints under 1/8 inch take unsanded grout, joints of 1/8 inch and wider take sanded grout, and glass tile usually gets an unsanded or other non-abrasive grout, since sand can scratch polished glass.
To choose a color, set two or three tiles on grout color samples in the room's own light, in the morning and again in the evening.
What a Tile Pattern Adds to the Cost
Nationally, tile labor runs about $3 to $15 a square foot, in cost data gathered from more than 10,000 homeowners' completed jobs. The tile itself adds about $2 to $15 a square foot for porcelain and $4 to $15 for glazed ceramic. A straight lay sits at the low end of that labor range. Diagonals, herringbone, chevron and small mosaics push toward the top, because of the cutting and layout time.
A pattern also changes how much tile you buy. Order about 10 percent more than the room measures for a straight lay or an offset, about 15 percent more for a diagonal or a herringbone, and more in a room with lots of corners. Buy it all at once, so every carton comes from one production run, and keep the leftover box for repairs.
| Pattern on a 100 sq ft bath floor | Tile to order | Labor ($300 to $1,500 range) |
|---|---|---|
| Straight lay | About 110 sq ft | Low end |
| One-third offset | About 110 sq ft | Low to middle |
| Diagonal | About 115 sq ft | Middle to high |
| Herringbone | 115 to 120 sq ft | High end |
Other lines on a tile quote often move it more than the pattern does. Removing old tile and repairing what's under it runs about $2 to $7 a square foot nationally, and leveling a floor for large tile adds a line of its own. We price your room when we measure it, because the room's size, the tile and the number of cuts your pattern makes are what move the total.
When a Tile Pattern Goes Wrong
If you can feel raised tile edges with bare feet, or a sock catches on them, the floor has lippage, and a little of it is allowed. On joints narrower than 1/4 inch, ANSI A108.02 accepts 1/32 inch plus the tile's own bow.
Past that, the usual causes on a patterned floor are a half offset on long tile, a floor that wasn't flat enough, or tiles that weren't held level while the mortar cured. Glazed tile can't be ground flat, so the fix is to pull the high tiles and reset them. That's where a spare box from the same lot pays for itself.
A herringbone or a stack that wanders off line was started without a control line, or wasn't checked against one. Nothing adjusts it once the grout is in, so the section from where it wandered comes up and is reset. The same goes for a grid that runs out of parallel with the cabinets or the main wall, which happens when the setting follows a crooked wall.
Thin slivers at a doorway or along a tub come from a layout that wasn't shifted before setting. You can live with them or have that row reset, and they are the reason the dry row in each direction comes first.
Cracked tiles in a pattern usually point to movement underneath. It may be a floor that flexes between joists, a crack in the slab running under the tile, or hollow spots where mortar didn't cover the back of the tile. A cracked tile can be cut out and replaced with a spare, but the cause gets fixed too, or the new tile cracks along the same line.
Tile Patterns From Our Catalog and Our Installers
At Waccamaw Floor Covering, we plan tile layouts and install tile from our showroom at 1717 4th Avenue in Conway. The herringbone, chevron and basketweave mosaics and the long tiles these patterns need are all in our tile catalog.
Daltile's Core Fundamentals and Rekindle come in herringbone mosaics, and its Stone A La Mod in basketweave. MSI carries herringbone mosaics, Angora basketweave, Blue Shimmer and Midnight chevrons, Aria at 24x48 and a long run of subway tile for stacks and half offsets. Emser Tile's Charisma is a herringbone, Intrigue a chevron and Barn a 6x35 plank. American Olean's Ascend is a chevron mosaic, and Happy Floors makes Alsacia at 24x48, Alpi at 12x48 and Acorn at 9x36 for one-third offsets.
Every tile in the catalog has a See in my room button that puts it into a photo of your own floor. In our showroom you can lay a few pieces out in the pattern you're considering, and there are photos of tile floors and a kitchen backsplash our crews finished in Aynor, Myrtle Beach and Loris.
We plan the layout, level the floor where large tile needs it, install the tile, and repair or replace tile later, so one crew answers for the whole floor. When you're ready, we come out, measure the room, look at what's under the old floor and price the pattern you have in mind.
Questions We Get About Tile Patterns
Can I mix tile patterns in one house?
Yes, as long as each pattern stops at a doorway or another clear break. A herringbone entry, a straight-lay kitchen and a basketweave bath can share one house, because each room reads on its own; what looks wrong is two patterns meeting in the middle of one open room.
Tie the rooms together with one color family and one grout color, and the house reads as a single plan.
Should the floor and wall tile patterns match?
No. A floor and a wall usually look better when one pattern leads and the other supports. A herringbone floor sits well under a plain stacked wall, and a patterned shower wall looks best above a quiet floor.
Lay the floor tile and the wall tile next to each other in the patterns you're planning, and it becomes clear quickly which one should lead.
Is herringbone a good do-it-yourself pattern?
No, not with loose tiles. Herringbone is the hardest common pattern to do yourself, because the whole floor hangs on one control line and every edge needs angled cuts. Herringbone mosaic sheets are the exception, since the zigzag is built into each sheet and the job becomes a straight lay of sheets.
If you go that route, dry-lay the sheets first and check that the joints between sheets match the joints inside them.
Does a one-third offset look different from a half offset?
Yes, a little. A half offset makes a regular brick pattern, while a one-third offset forms a gentle stepped diagonal across the floor that shows from some angles. Once furniture is in the room, the steps fade into the floor, and on long tile the one-third offset is the pattern that keeps the floor flat underfoot.
Lay out three rows of loose tile both ways to see the difference before you choose.
Seeing Your Pattern Before It Goes Down
Bring a tile or two you like, or a photo of the look you want, and tell us which room it's for and where you see it from. We'll measure the room, plan where the pattern starts and how the cuts fall, and price the floor before a single tile is set.


